Dishwashers have become indispensable appliances in our modern kitchens, making washing dishes a breeze. However, like all machines, they can encounter issues over time.

One common problem many GE dishwasher owners face is the upper spray arm coming off. Fortunately, this is a repair you can easily tackle yourself. In this guide, we’ll walk you through the steps to fix a GE dishwasher upper spray arm that has come off.
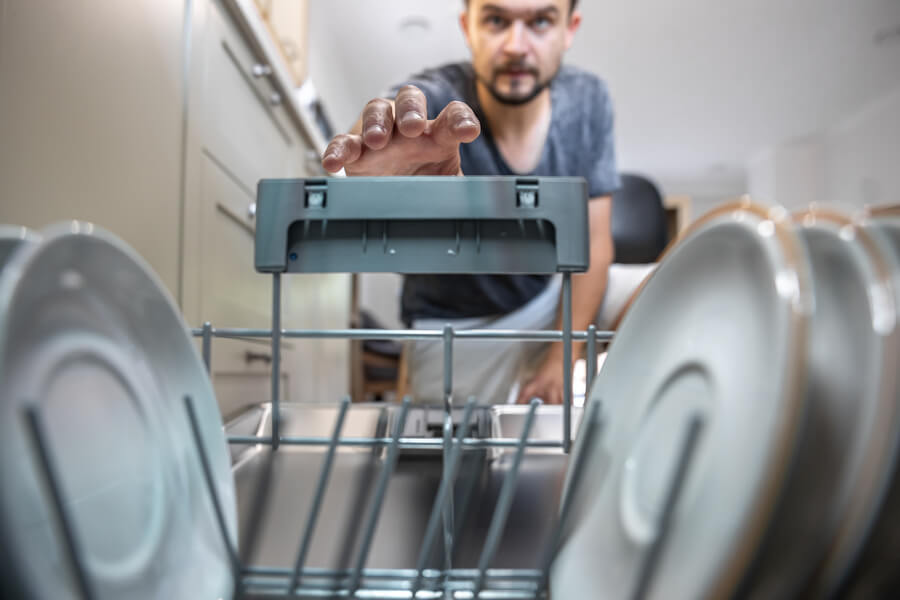
Understanding the Upper Spray Arm
To understand why the upper spray arm is crucial to your dishwasher’s performance, let’s first look at its role in dishwashing. The upper spray arm distributes water evenly to your dishwasher’s top rack.
This ensures that dishes placed on the upper rack receive the same thorough cleaning as those on the lower shelf.
The upper spray arm is typically located beneath the upper dish rack and spins during the wash cycle.
As it rotates, it sprays water onto the dishes, dislodging food particles and detergent residue, resulting in sparkling clean dishes.
Common Reasons for The Upper Spray Arm Coming Off
Now that you understand its importance let’s explore why the upper spray arm might come off in the first place:
- Wear and Tear: Over time, the plastic or metal components that hold the spray arm in place can weaken due to continuous exposure to water and detergent. This can lead to the arm becoming dislodged.
- Obstructions: Occasionally, large or bulky items in the upper rack can obstruct the upper spray arm’s movement. If it encounters resistance while spinning, it may pop off.
- Accidental Force: Loading and unloading dishes can sometimes cause the upper spray arm to be accidentally pushed or knocked out of its mounting.
- Loose Fasteners: The upper spray arm is usually attached to the dishwasher’s water supply tube or manifold with fasteners, such as screws or clips. The spray arm can detach if these fasteners become loose due to vibrations during operation or over time.
- Hard Water Deposits: If your dishwasher is exposed to hard water, mineral deposits can accumulate over time. These deposits can build up on the upper spray arm’s connection points, causing it to become stuck or dislodged.
The Step-by-Step Repair Guide
Step 1: Turn off the dishwasher
Safety should always be the priority when working on any appliance. Turning off the dishwasher is crucial to ensure your safety during the repair process. Here’s why:
- Preventing Electrical Hazards: Dishwashers are powered by electricity. Turning off the dishwasher eliminates the risk of electrical shock while handling its components.
- Avoiding Accidental Activation: Dishwashers can be programmed to start automatically at specific times. Keeping the dishwasher off ensures it won’t create a cycle while you’re working on it, preventing any unexpected mishaps.
To turn off your dishwasher, locate the power switch or circuit breaker dedicated to the appliance and switch it off. Unplugging it if connected to a standard wall outlet is also a good practice.
Step 2: Remove the dishwasher racks
Removing the dishwasher racks is necessary to access the upper spray arm and perform the repair. Here’s how to do it:
- Upper Rack: If your dishwasher has a two-tiered design, start with the upper rack. Slide it out as far as it can go, then lift it slightly. Often, clips or hooks on the sides secure it in place. Once released, carefully pull it out and set it aside.
- Lower Rack: If your dishwasher has a lower rack, remove it next. It typically sits on a set of rollers. Slide it toward you until it stops, lift it slightly, and continue pulling it out. Place it alongside the upper rack.
Removing the racks creates ample space to access the upper spray arm. Remember to handle the racks with care to avoid damaging them.
Step 3: Locate the upper spray arm
Identifying the upper spray arm is essential before proceeding with the repair. Here’s how you can locate it:
- Position: The upper spray arm is usually just beneath the upper dish rack. It’s a horizontal component with multiple nozzles or openings to spray water.
- Rotation: During a wash cycle, the upper spray arm will spin, evenly distributing water to the dishes on the top rack.
- Material: The upper spray arm is typically made of plastic or metal and connects to the water supply tube or manifold.
Step 4: Reattach the upper spray arm
Once you’ve located the upper spray arm, it’s time to reattach it to your GE dishwasher. Here’s how to do it:
- Inspect the Components: Before reattaching, ensure the upper spray arm and its mounting points are clean and free from debris or residue.
- Align the Spray Arm: Carefully align the upper spray arm with its mounting point. There may be a small notch or guide that helps with alignment.
- Press or Screw In: Depending on your dishwasher model, you may need to press the spray arm firmly onto its mounting point or use screws or fasteners to secure it.
- Test the Attachment: Give the spray arm a gentle tug to ensure it’s securely attached. It should not wobble or come loose.
Step 5: Secure the spray arm
Ensuring that the upper spray arm stays securely attached is vital for your dishwasher’s proper functioning. Here are some methods to make sure it remains in place:
- Tighten Fasteners: If your dishwasher uses screws or clips to secure the spray arm, ensure they are correctly tightened. Use a screwdriver or pliers, but avoid overtightening and damaging the plastic components.
- Clean Connection Points: Occasionally, debris or detergent residue can accumulate on the spray arm or its mounting points, causing it to slip off. Regularly clean these areas to maintain a secure connection.
- Inspect for Damage: Examine the spray arm for any signs of damage, such as cracks or broken components. If it’s damaged, consider replacing it to ensure a secure fit.
- Proper Loading: Be mindful of how you load dishes into the upper rack. Avoid placing items that may obstruct the spray arm’s movement, which can cause it to dislodge.
Step 6: Reassemble the dishwasher
After successfully reattaching and securing the upper spray arm, it’s time to put your dishwasher back together. Here’s what you should do:
- Replace the Racks: Begin by sliding the lower rack back into place on its rollers. Ensure it’s fully seated and glides smoothly.
- Lower the Upper Rack: Carefully lower the upper dish rack back into position. Ensure it clicks or locks securely into place.
- Power On: Restore power to your dishwasher by switching on the circuit breaker or power switch.
- Test Run: Run a short test cycle with an empty dishwasher to confirm that the upper spray arm remains in place during operation and functions correctly.

Test the dishwasher
Once you’ve reattached and secured the upper spray arm and reassembled the dishwasher, running a test cycle is essential to ensure everything functions correctly. Here’s how to do it:
- Load Dishes: Load dirty dishes into the dishwasher’s upper and lower racks. This will simulate a typical wash load.
- Add Detergent: Place dishwasher detergent in the dispenser according to your dishwasher’s recommendations. Make sure it’s the right amount for the load size.
- Select a Cycle: Choose a standard wash cycle or the one you typically use. Ensure that the water temperature and settings are appropriate for the load.
- Start the Cycle: Close the dishwasher door and start the cycle as you normally would. Be attentive during the process to check that the upper spray arm is spinning and distributing water correctly.
- Monitor the Results: After the cycle, open the dishwasher door and inspect the dishes in both the upper and lower racks. They should be clean and free from any food residue.
Final checks and troubleshooting
If, after running the test cycle, you still encounter issues with the upper spray arm, here are some final checks and troubleshooting steps to consider:
- Inspect for Damage: Recheck the upper spray arm for any signs of damage or wear. If you find any, it may need replacement.
- Check Water Pressure: Low water pressure can affect the upper spray arm’s performance. Ensure your dishwasher receives adequate water pressure by inspecting the inlet valve, water supply, and filters.
- Clean Filters and Nozzles: Clogged filters or nozzles can restrict water flow to the upper spray arm. Clean or replace any filters, and use a toothpick or small brush to clear any blockages in the spray arm’s nozzles.
- Consult the Manual: Refer to your dishwasher’s user manual for troubleshooting tips for your model. It may guide on common issues and solutions.
- Seek Professional Help: If the problem persists despite your efforts, it may be time to contact a professional appliance repair technician. They can diagnose and fix more complex issues with your dishwasher.